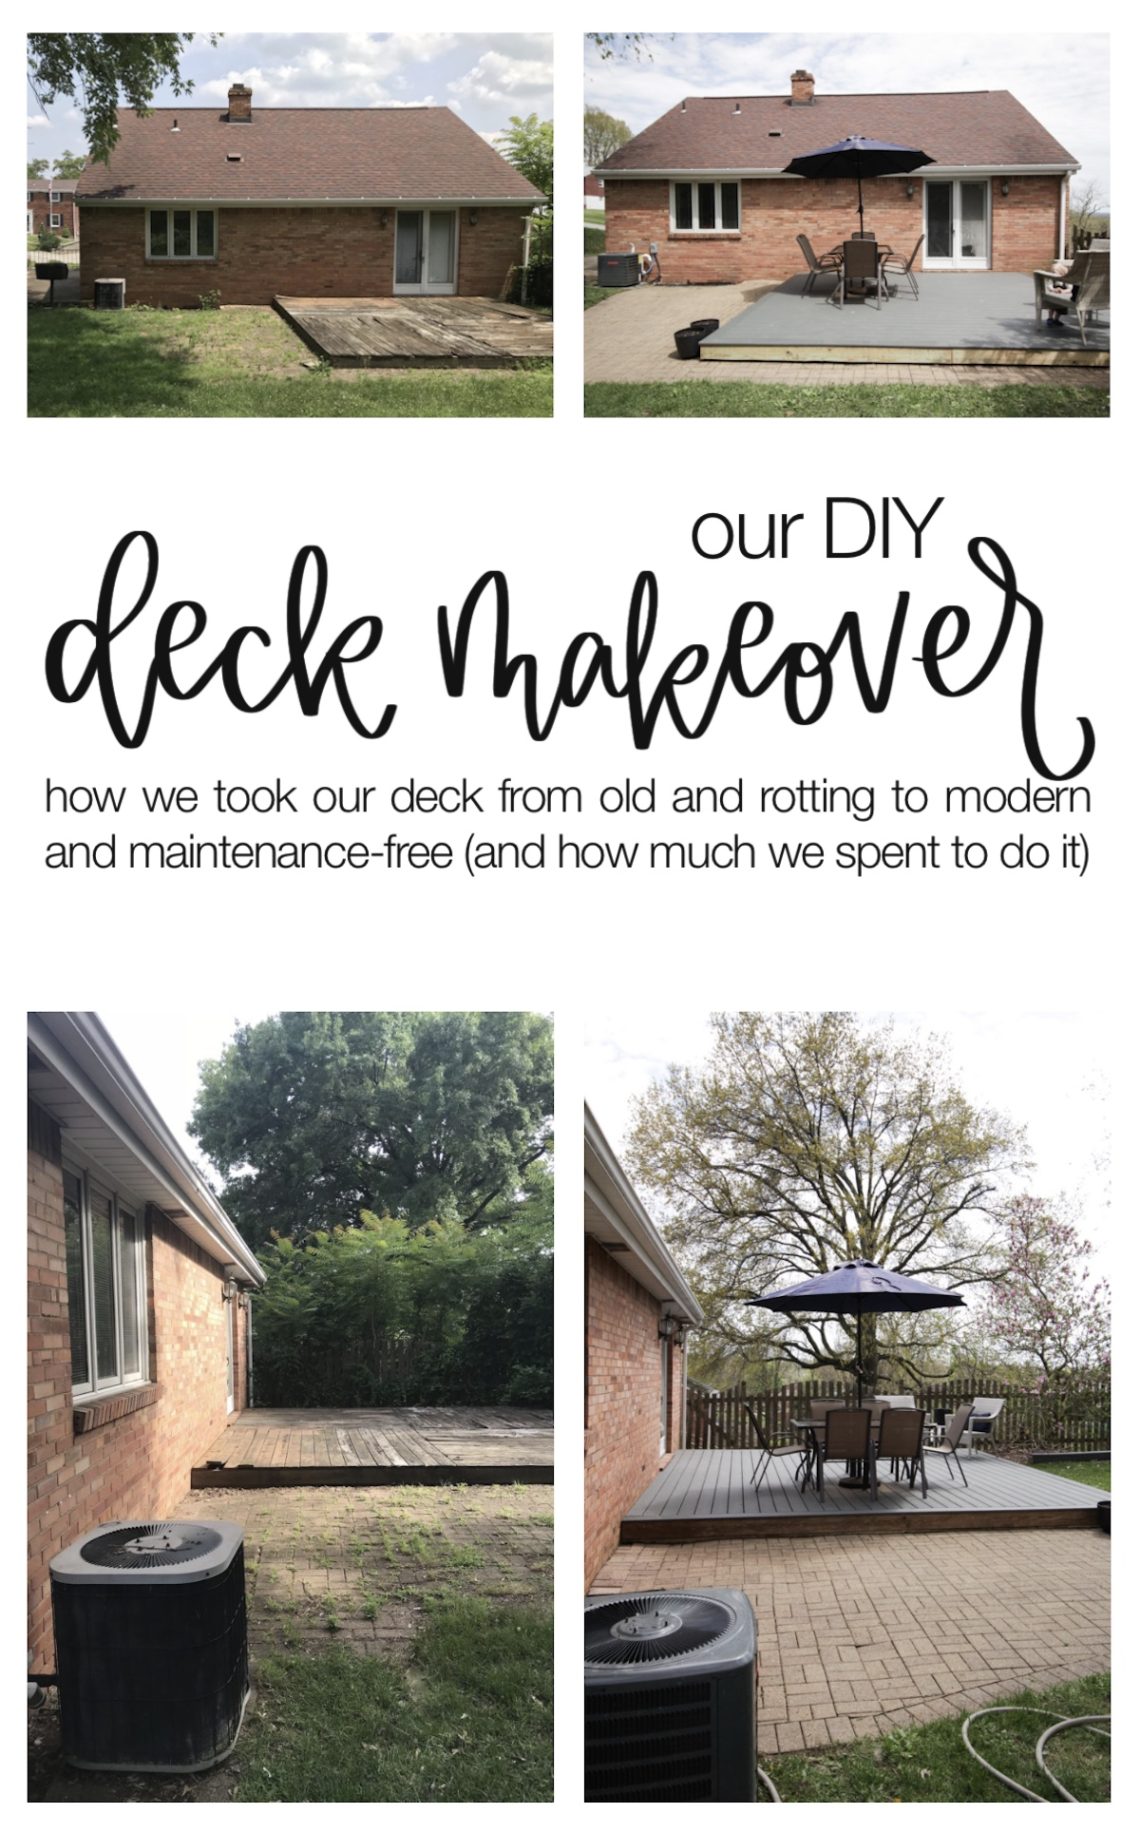
Today, I’m revealing our (finally) finished deck makeover! When we moved in, our deck boards were old and rotted, the pavers were overgrown with weeds, and our yard had been about halfway taken over with vines and overgrown plants. This deck was one of the items on our 2020 home projects list, and it felt great to cross it off! Having lots of livable outdoor space is a high priority for us, because we know we’ll be spending lots of time in the backyard with Jamie this summer!
The backyard was one of the things we loved most about our house when we first saw it; we knew it had tons of potential for a great outdoor living space. Although small, the yard is quite flat and pretty square (a real rarity in western PA!), and we loved the mature trees. A few other selling features were the fence, the privacy (pretty good for a neighborhood), and the perfect combo of lots of warming sun in the winter and nice shade in the summer (once the trees have leaves).
After ripping off the old deck boards pretty early on, we left the joists exposed for a year-ish. We bought the new Trex boards last winter but between an error in our board delivery resulting in a shipping delay, the winter, and a baby, we didn’t get around to finishing it until this spring. We are SO happy that we finished it just a few weeks before our state’s COVID-related stay-at-home order went into effect. We’ve been getting a TON of use out of it already!
Note: this post may contain affiliate links (i.e., if you click my link and make a purchase, I’ll make a small commission at no additional cost to you). Read my full disclosure policy here.
(If you just want to look at pictures, keep scrolling!)
Our Deck Makeover: The Plans & Process
When deciding how to re-do the deck, we decided on Trex composite decking boards for a few reasons. After living with them for a few months, I wanted to share some of the pros and cons that weighed into our decision:
Trex Decking: Pros
- Easy maintenance
- Will last almost forever
- Able to use hidden fasteners for a clean, modern look
- More flexibility in colors (without having to restain every few years)
Trex Decking: Cons
- Cost is higher than pressure-treated lumber
- Our color (Clam Shell) shows dirt easily
- Boards get HOT in the sun
- Installation can be a little trickier than with traditional wooden boards
For us, the pros far outweighed the cons; however, I would say the biggest con for us has been how the boards heat up in the sun. If you live in a hot climate and your deck isn’t shaded, I would probably recommend a different material!
After deciding on our materials, it was time to make a plan for the design. We decided to go with a simple and modern horizontal pattern with a picture frame edge. Since we were replacing the boards on an existing deck, we did not have to build any deck supports, but we did have to rotate a few joists and add a few extra ones to support the picture frame edge. We also had to build out the end facing the backyard a tiny bit so that we could end with a full board. I’ve been thrilled with the way it looks!
There are a ton of great tutorials out there for installing Trex with hidden fasteners so I won’t include that here. It wasn’t at all difficult to install; if you’re just replacing deck boards like we were, the project could be done in a weekend or two pretty easily. One thing we did that I think made a big difference was spray painting the joists black – this helps the hidden fasteners blend in more and makes the joists less visible.
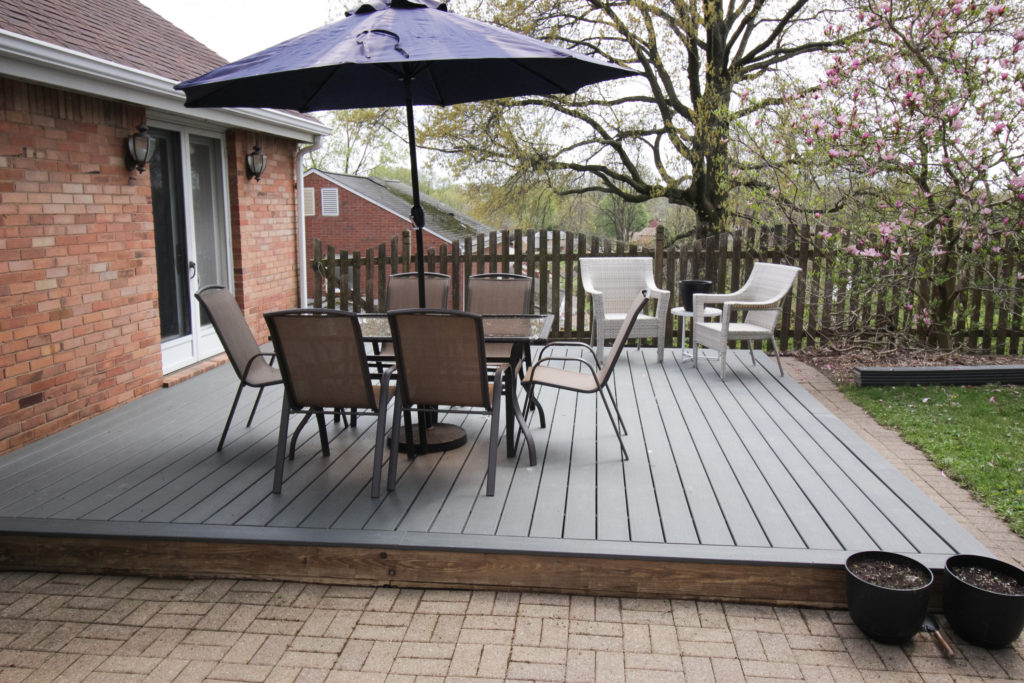
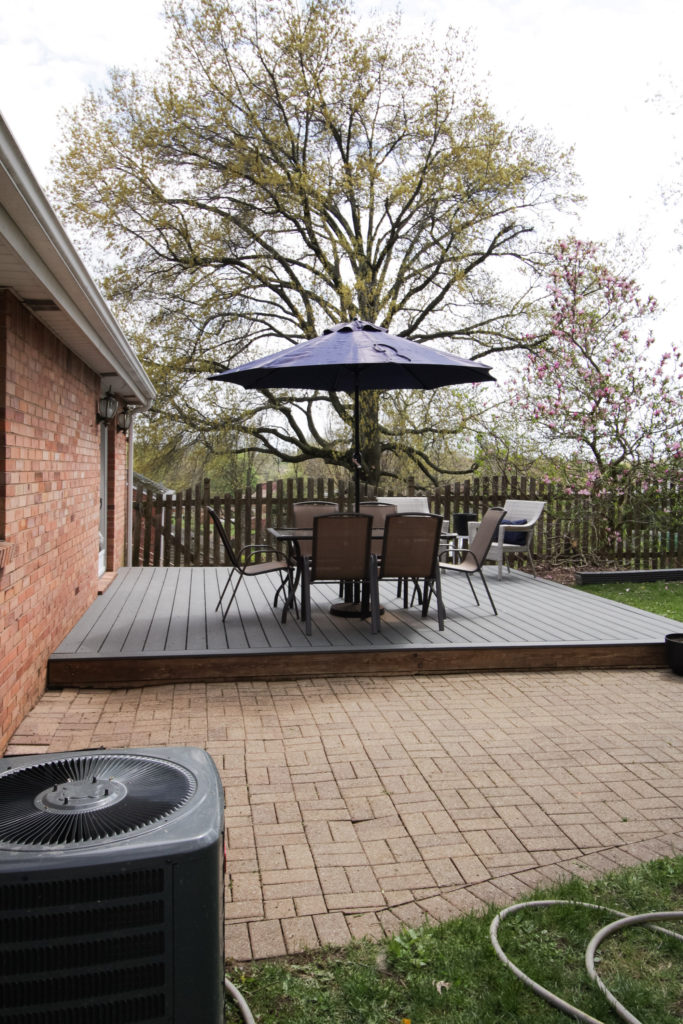
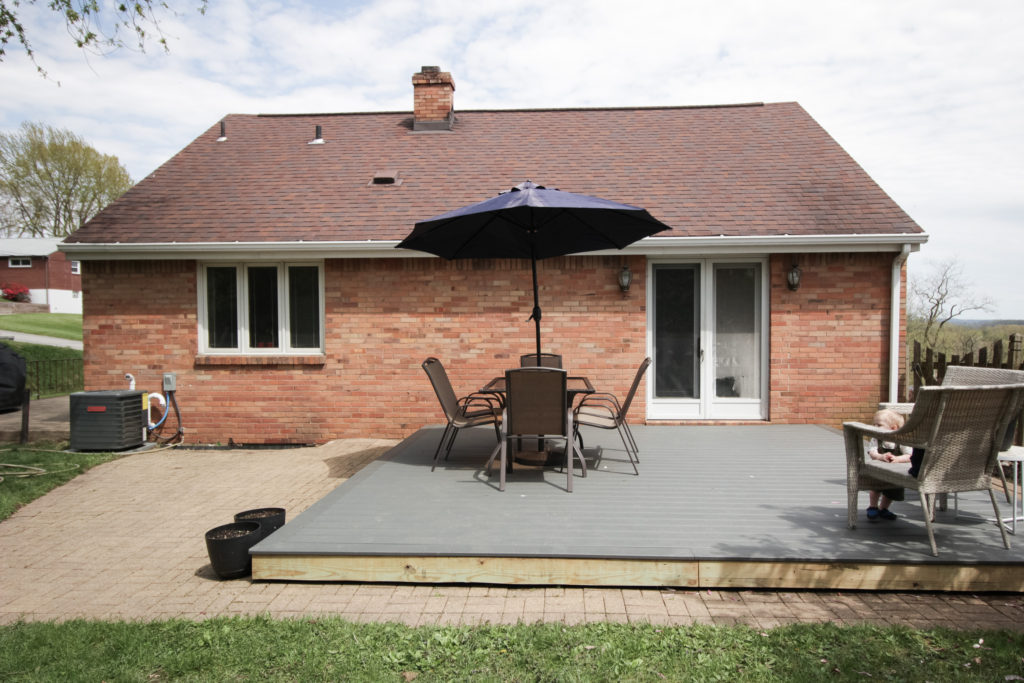
Our Deck Makeover: The Reveal
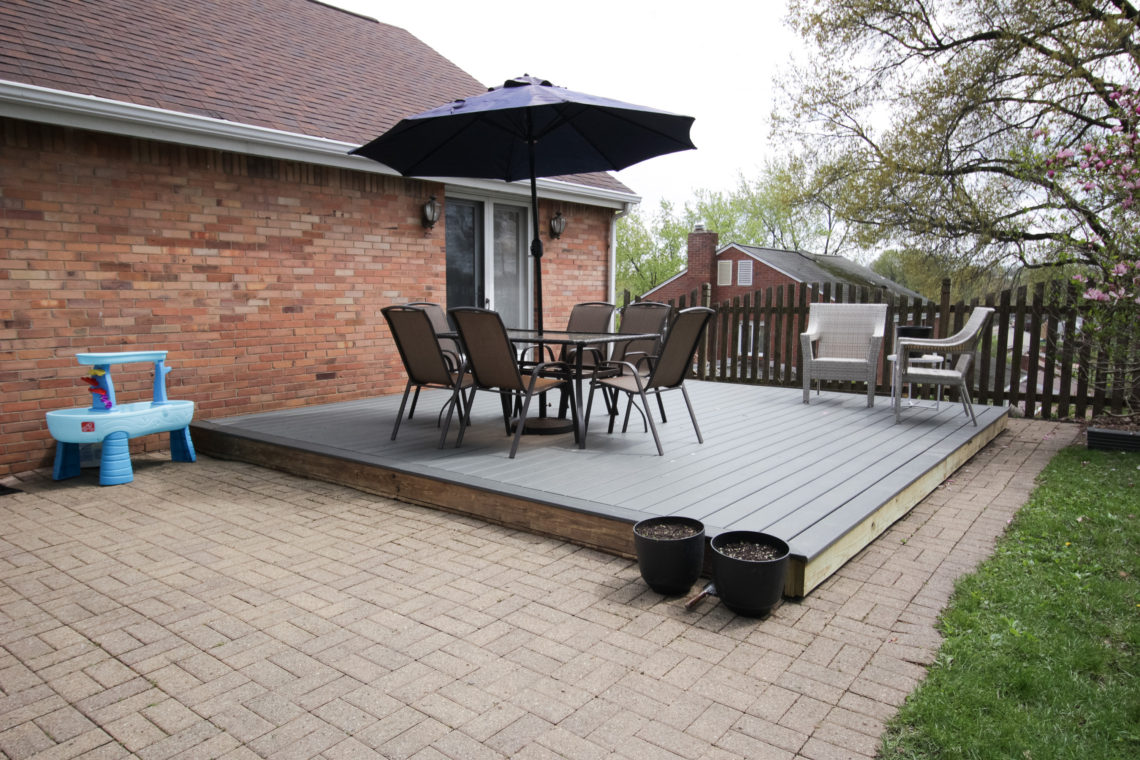
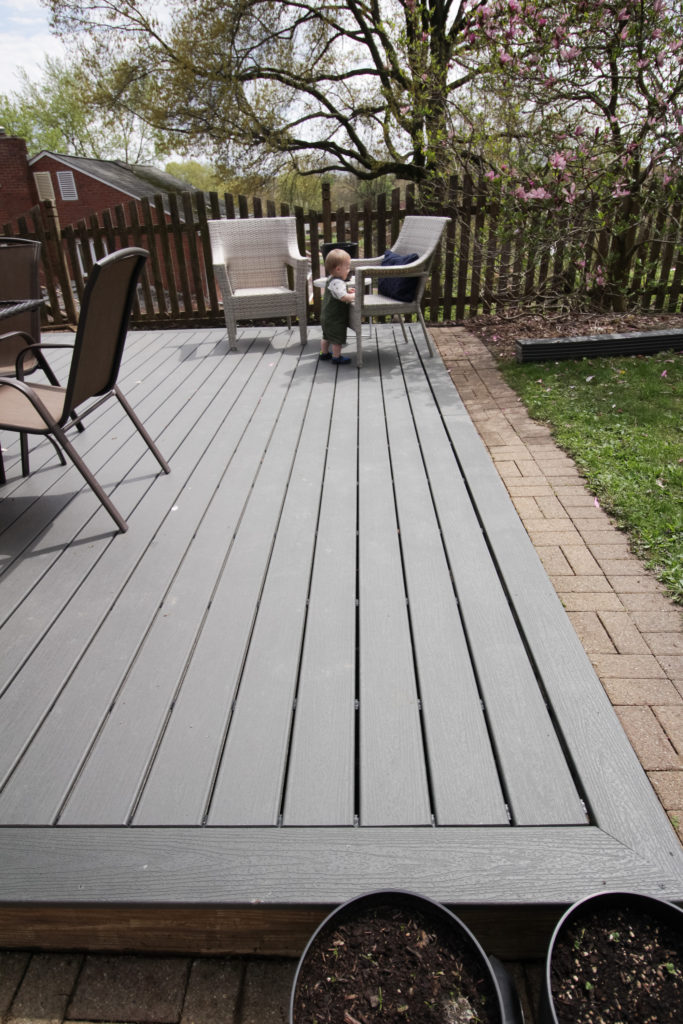
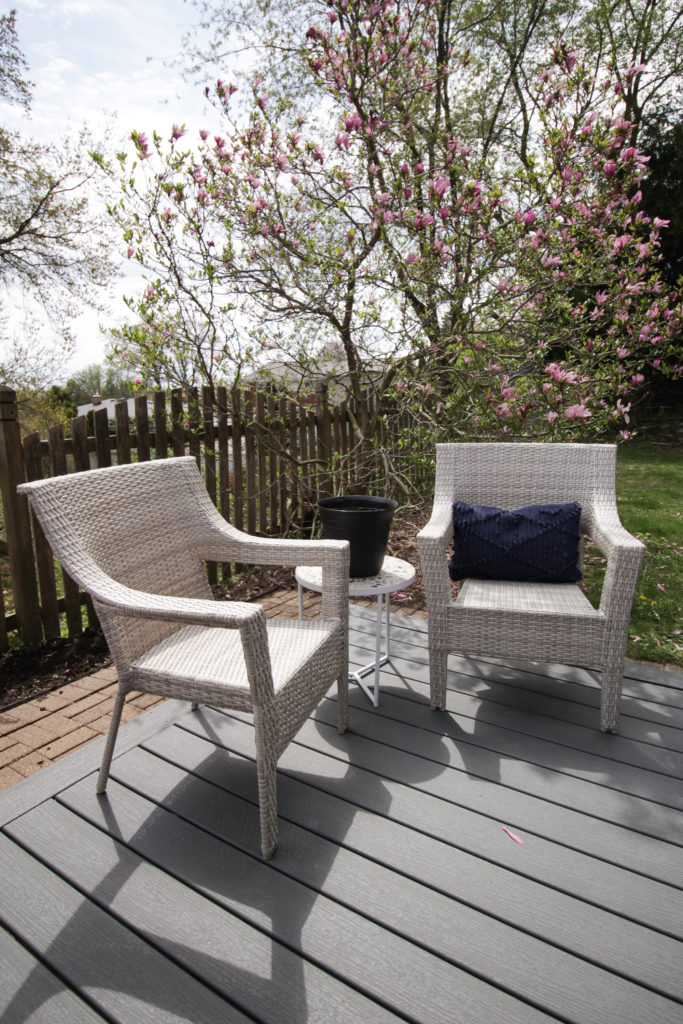
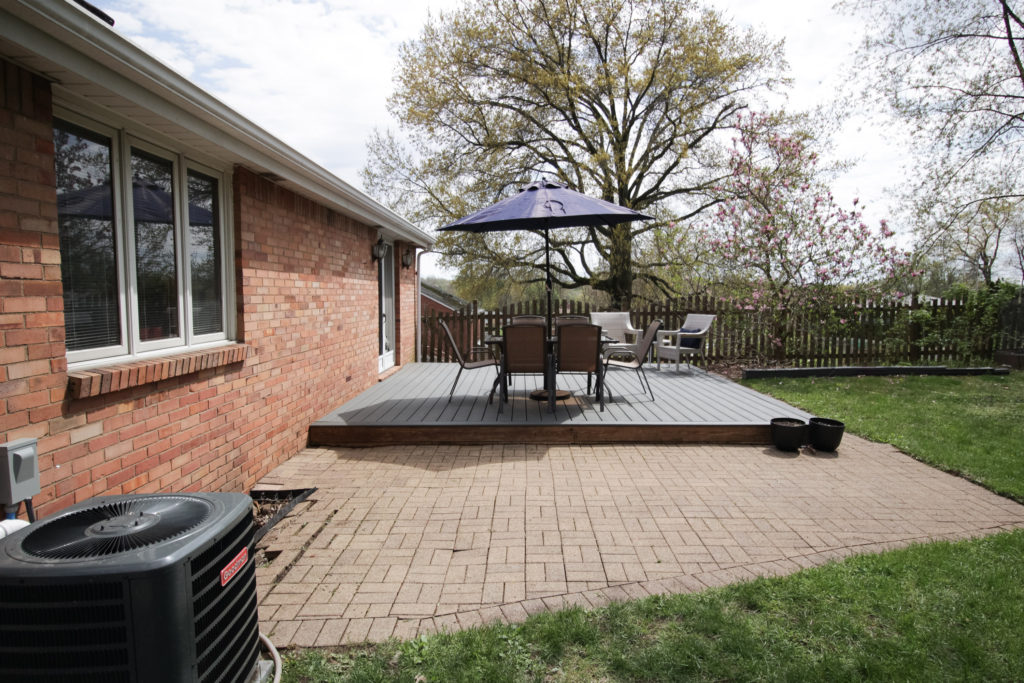
Our boards are Trex composite decking in the color Clam Shell. The table, chairs, and umbrella are all from Aldi last year. Our woven chairs, side table, and pillow are all from Target.
Before and After
(Because it wouldn’t be a great renovation reveal blog post without a few before-and-after photos! What a difference, right?! We’re so proud of our progress in the backyard this year!)
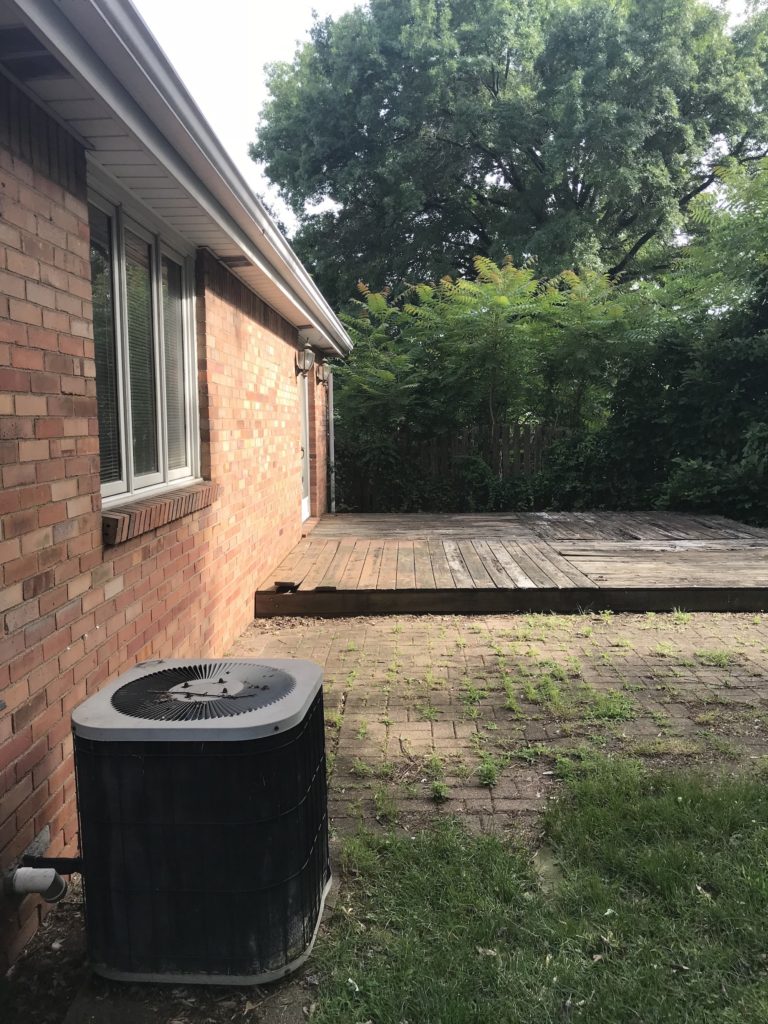

One very exciting addition that maybe isn’t too noticeable in the photos: a new A/C unit! We are very happy to have working air conditioning now.
How Much Did We Spend?
- Labor: $0!
- Supplies: $1534
- This includes the deck boards, hidden fasteners, lumber, screws, etc. Almost all this cost was for the deck boards.
- Our deck is just over 16’x16′ – around 250 sq. ft.
- Furniture: $438
Overall, we spent just under $2000 to replace the deck boards and furnish the new deck. If we went with pressure-treated lumber for our deck boards, we would have saved a bit of money here. Since we didn’t have to pay any for labor or for the deck substructure, and we will save time and money on maintenance, we were fine with spending a bit more money for composite decking.
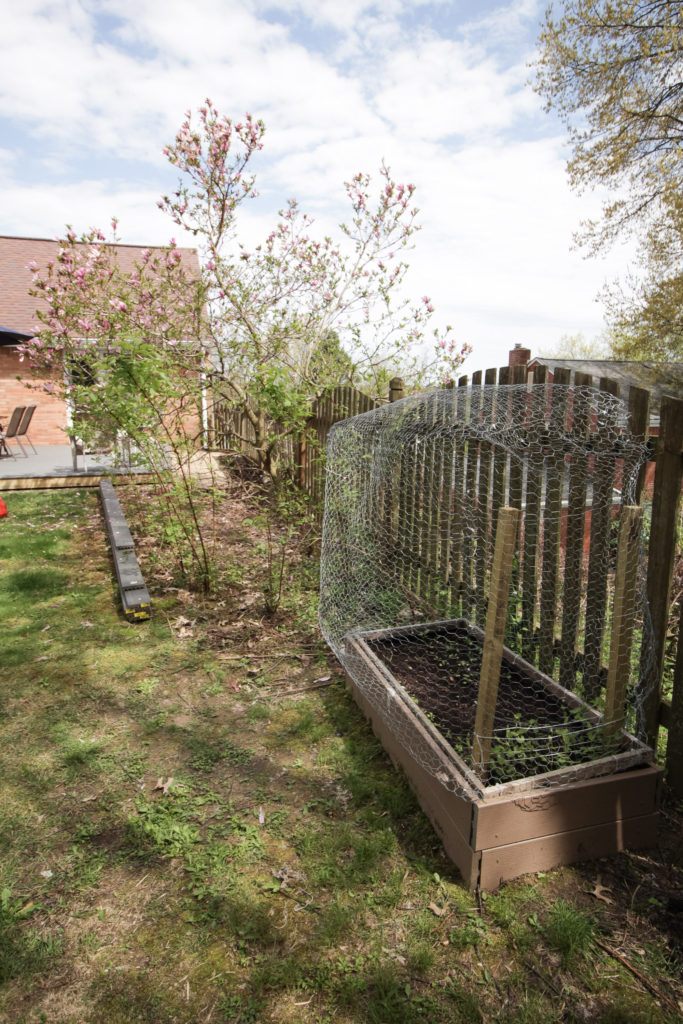
It’s also worth noting that we bought a number of extra deck boards because we had to have them delivered (we have no way of hauling 16′ boards and they didn’t carry them in-store). We’re going to use the extra boards to build some raised garden beds in our side yard, so there will basically be zero waste! I think we have one 12′ board and about five 16′ boards left over, which means a few hundred dollars less we have to spend on our garden project.
We are so happy with our deck makeover! It has already been worth the time, money, and hard work that it involved, and we’re sure we’ll be enjoying the deck for years to come!
To see more posts on our home renovation progress, click here!
Pin This Post: Our DIY Deck Makeover
[…] we completed: The deck is completely finished and SO great! (See our blog post about it here.) We finished it at the perfect time, in early March, so we’ve gotten plenty of use out of it, […]